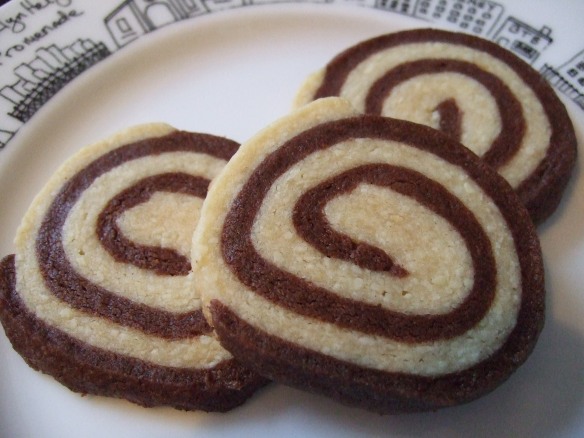
Amy won! And then I won! Whooo! In reading Amy’s preferences (see this post), I focused in on her love of soft, buttery cookies. As someone who shares Amy’s sensitive teeth issue, I understood the aversion to hard candies and cookies. And although I do not gravitate toward buttery cookies myself, I knew that the underlying composition of the cookies would be important. From there, I thought almond and chocolate would make a great taste combination. And, of course, I wanted the cookies to be visually appealing. So, what do you think?
Pretty, no? I impressed myself! (Hand patting back…I admit it, I’m still glowing over the win!) (Although to be honest, I would have chosen Alison’s bars if it was my choice…but as I said, I don’t tend to gravitate toward shortbread/butter cookies).
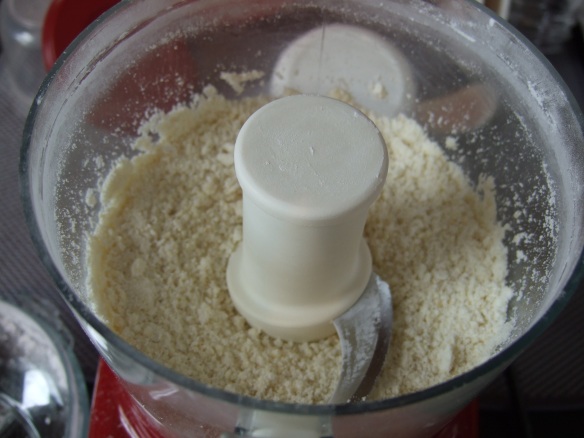
Making these cookies involves two separate batters. For the almond cookie butter, I used a food processor to incorporate whole almonds and confectioners sugar.
To get the perfect, melt-in-your-mouth consistency, I used an old European trick of using a hard boiled egg, pushed through a strainer.
For the chocolate dough, I wanted the chocolate to taste like milk chocolate, given Amy’s preferences, so I used chocolate with a slightly lower % cocoa than I would normally use (54%). For both batters, I used good butter. Unfortunately, I initially didn’t buy enough of the Plugra, and the grocery store near me didn’t carry it, so I had to improvise using a different butter for each “half” of the cookie. I used Plugra for the almond dough, and Kerry butter (which is slightly sweeter) for the chocolate dough.
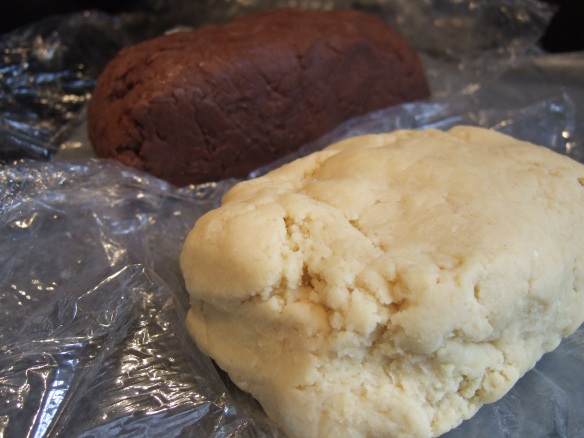
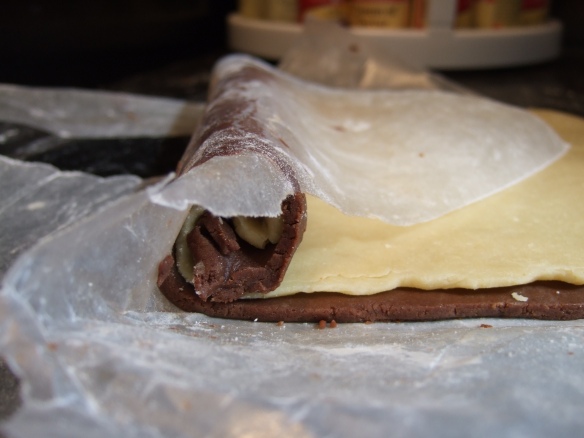
To get the spiral pattern, each dough is refrigerated and shaped in two halves (four logs of dough in total), then each log is rolled into an approximately 1/4-inch deep rectangle and laid onto wax paper (they can be rolled between sheets of wax paper if you can manage it–I found that the wax paper slid along the counter too much).
The rectangles of dough are stacked on top of one another and rolled tightly together, using the wax paper as a guide.
(This was a bit looser than it should have been, because I didn’t roll the dough tightly enough. I adjusted by carefully pressing the dough together from the outside, after wrapping it in plastic wrap). Finally, the rolled logs are refrigerated again for at least two hours, then removed and cut into 1/2-inch slices.
I loved the visual impression these cookies made! And the taste was perfect. These cookies are buttery and rich in flavor, without being super sweet.
After that long introduction, here’s the recipe for Amy’s Almond and Tar Heel Cookies:
Almond and Tar Heel Cookies
Almond dough ingredients
1/2 cup whole blanched almonds
1/2 cup confectioners sugar
1/4 tsp cinnamon
1 hard-boiled egg yolk
1 cup all-purpose flour
3/4 tsp baking powder
1/8 tsp salt
1 and 1/4 stick unsalted butter
1/2 tsp vanilla extract
1/4 tsp almond extract
Chocolate dough ingredients
3 oz chocolate (I recommend 50-60%)
1 cup all-purpose flour
1 tbsp dutch-processed cocoa
1/4 tsp baking powder
1/8 tsp salt
1 stick unsalted butter, softened
1/2 cup granulated sugar
1 large egg yolk
1 tsp vanilla extract
Almond dough instructions
- In a food processor, pulse together almonds and 1/4 cup of confectioners sugar until well-combined. Transfer to a large bowl and mix with remaining sugar and cinnamon.
- Force egg yolk through a sieve and into a small bowl.
- Whisk flour, baking powder, and salt in a medium bowl.
- Beat sugar mixture from step 1 with butter on medium high until well blended. Add egg yolk and beat. Add vanilla and almond extracts and beat.
- Add flour mixture slowly, beating at a low speed.
- Split the dough in half and shape each half into a rectangle, wrap in plastic wrap, and refrigerate for 2 hours or more.
Chocolate dough instructions
- Chop chocolate into small pieces and melt in a double broiler.
- Sift flour, cocoa, baking powder, and salt into a medium bowl. Set aside.
- Beat butter and sugar at medium speed for about two minutes.
- Add egg yolk and vanilla and beat until just incorporated.
- Add flour mixture slowly and beat at a low speed.
- Knead dough until smooth on a clean work surface, separate into two halves, and shape both into a log. Wrap each log with plastic wrap and refrigerate for at least an hour.
Shape cookies
- Remove one log of each dough. Using a well-floured work surface, roll dough into 1/4 inch thick rectangles. Place wax paper between the dough and roller to prevent sticking. After the dough has been partially rolled out, place another sheet of wax paper underneath. To make rectangles even, you can cut along the sides and place extra dough to other areas, then press and roll to combine.
- After both doughs are rolled out and on wax paper, invert one sheet of dough onto the other, then peel the wax paper off the top. Lightly press the two doughs together.
- Slowly roll both doughs together, pressing carefully as you go. Use the wax paper from underneath the lower half to guide you and keep the dough together. The chocolate dough can be a little bit crumbly, but it will roll with guidance.
- Refrigerate for two hours or more. In the meantime, preheat the oven to 350 degrees and prepare baking pans with parchment paper.
- Slice log of dough into 1/2 inch disks. Place on baking sheets, at least 1.5 inches apart. Bake about 10 minutes.
- Remove from oven, cool slightly on pan, then transfer on a wire rack to cool completely.
Enjoy!


